
Robotics Studio · With Krea
How to design a robot
This course shows your kid how to design a robot, starting with the job it does and ending with a labeled blueprint on paper. Krea hosts 4 short films on picking a job, choosing a body, drawing the blueprint, and giving the robot a personality. The films take about 3 minutes and the drawing about 45 minutes; no robot kit is needed.
How to design a robot is part of Kubrio Learn: short courses that inspire kids to make things. Learn more
Watch all 4 lessons in the appWhat your kid makes
Your kid ends with a labeled robot blueprint on paper: a job, a body that fits it, every part named, and a personality. It's the starting point for the next course, Build a robot that walks.
- Ages
- 6 to 13
- Time
- 4 films, about 3 minutes, then about 45 minutes of drawing
- You need
- Paper, pencil
- Host
- Krea
The 4 lessons
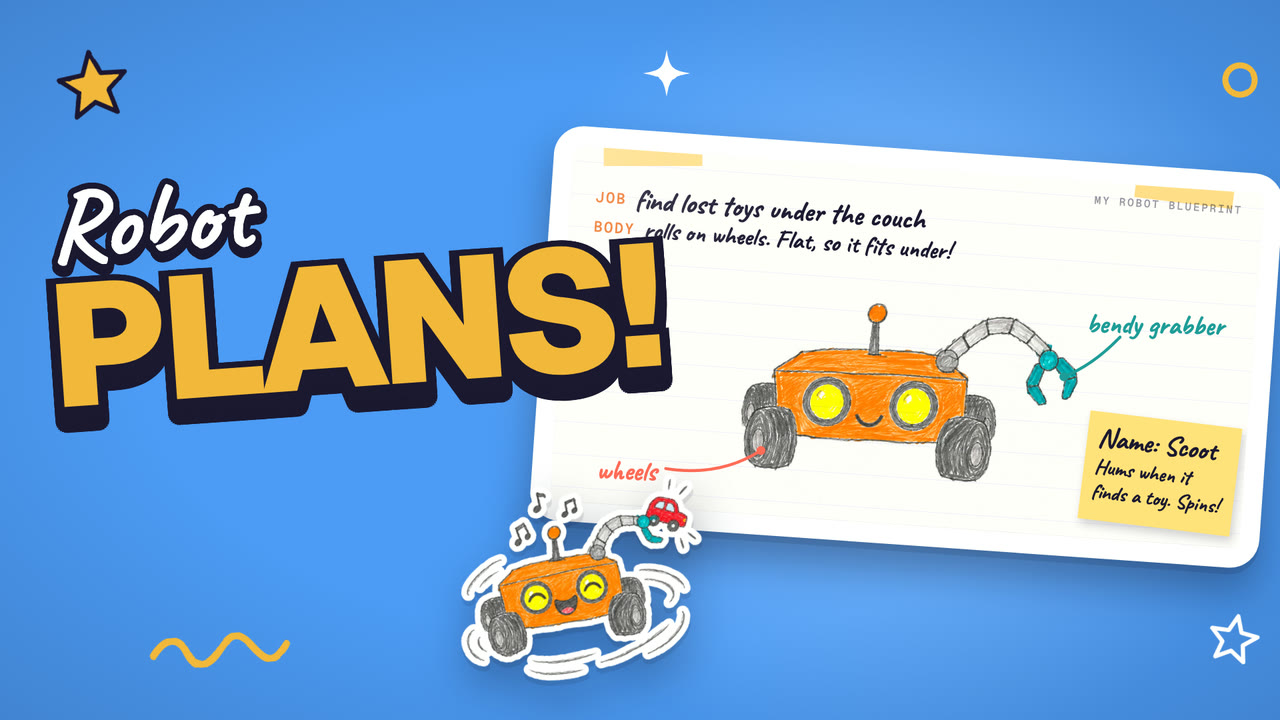
Lesson 1. What's its job?
A robot starts with one job it does really well.
- Think of a chore or a problem at home
- Pick one job for your robot
- Write the job at the top of your paper
Where: Paper
Lesson 2. Pick a body
The job tells you which body to pick.
- Look at the ways a robot moves: wheels, two legs, crawling like a bug, or one long arm
- Ask where your robot works, and pick the body that fits
- Under the job, write how it moves and why that fits
Where: Paper
In the app
Lesson 3. Draw the blueprint
A blueprint shows every part, with a label.
- Draw your robot big, from the front
- Label how it moves, how it sees, and how it grabs
- Draw arrows from each label to its part
Where: Paper
In the app
Lesson 4. Give it a personality
A name and one habit make a robot feel alive.
- Give your robot a name
- Pick one funny habit, like humming or spinning
- Add both to your blueprint as a note, and keep the page safe
Where: Paper
In the app
Lesson 1 transcript: What's its job?
Hi, I'm Krea. Today you're an inventor. Let's dream up a robot!
Every robot starts with one question. What's its job?
Does it fold socks? Feed the fish? Water the plants?
Pick one job, only one. A robot that does one thing really well is a great robot.
Here's mine. My toys keep rolling under the couch, and I can't reach them. So my robot's job is: find lost toys under the couch.
Your turn. Think of a chore or a problem at home. Write your robot's job at the top of your paper.
Free guides to practise with
Questions parents ask
Does my kid need a robot kit?
No. The whole course happens on paper, with a pencil.
What age is this for?
Kids 6 to 13. Younger kids draw the robot and say the labels while a grown-up writes. Older kids often add side views and more detailed parts.
What if my kid can't draw well?
A blueprint is boxes, circles, and labels. The ideas matter more than the lines: what the robot does and how each part helps it do it.